Rice crispy squares
A sticky, crispy, marshmallow base, topped with gooey caramel and a thick chocolate layer. Plus, you don't have to even turn the oven on.
Ingredients
(Makes 9 – 16)
For the base
- 200g marshmallows
- 50g (3½ tbsp) butter
- 100g milk chocolate
- 180g rice bubbles
For the caramel
- 185g (¾ cup plus 1 tbsp) butter
- 35g (3 tbsp) caster sugar
- 65g (3 tbsp) golden syrup
- 1 can condensed milk (alternatively use 1 can Nestle caramel)
For the topping
- 200g milk chocolate
- 80g white chocolate
Directions
1. Line a 23cm square baking tin with baking paper, leaving a little overhang as this will help you remove it from the tin later.
2. Place a large saucepan over a low heat, then add the marshmallows, butter and chocolate and allow to gently melt, stirring so it doesn’t stick.
3. Place rice bubbles in a large bowl and pour over the sticky marshmallow mixture. Use a spatula to mix so that the cereal is evenly covered.
4. Transfer the mixture to the prepared baking tin, compacting it down tightly using your hands, a potato masher or the back of a spoon – it’ll be very sticky at first but I find it becomes less so as you keep pushing it in. Place in the fridge while you make the caramel.
5. For your caramel layer, place all the ingredients in a small saucepan over a low to medium heat. Allow the butter to melt and the sugar to dissolve, then mix well to ensure it doesn’t stick to the bottom and is all well combined. Turn the heat up so the mixture starts to bubble a little and keep stirring continuously for 5–8 minutes or until the mixture has thickened and turned dark golden.
6. Pour your caramel on top of your puffed rice layer, spreading it so that it’s level and even. Place in the fridge to chill and set for at least 1½ hours.
7. In two separate small bowls, melt the milk chocolate and white chocolate. You can do this in the microwave (mixing in between short bursts) or in a heatproof bowl over a saucepan of boiling water on the hob, making sure the bowl isn’t touching the water and stirring until melted.
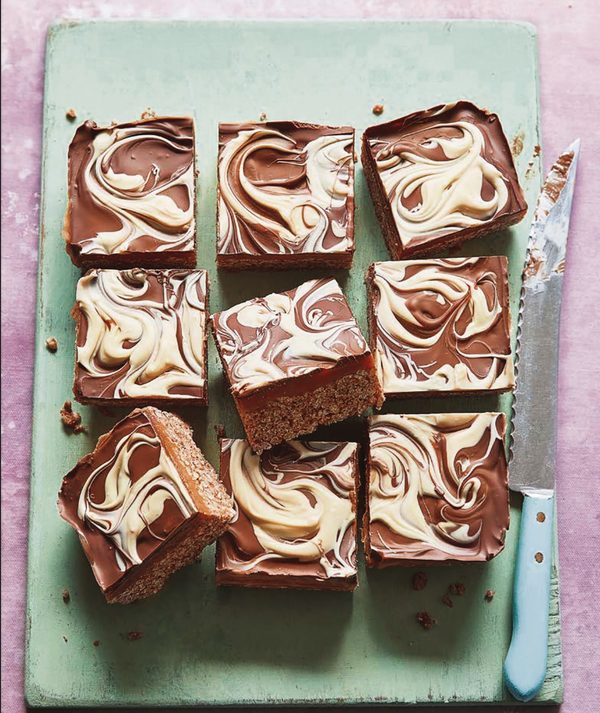
8. First, pour the melted milk chocolate all over the top of the chilled, set caramel layer. Spread it out in an even layer, right to the edges. Working quickly, as the chocolate will begin to set when it hits the cold caramel, spoon big dollops of melted white chocolate on top of the milk chocolate layer and use a skewer to create a swirly pattern. Place back in the fridge and allow the chocolate to fully set for around 1½ hours.
9. Once fully set, remove from the fridge and bring to room temperature for 30 minutes (this will prevent the tops cracking as you cut them). Remove from the tin and slice into 9 large or 16 smaller squares.
Tips
You can always omit the caramel layer and just make chocolate-topped bars if you fancy!
Warming your knife in hot water before making each cut helps the knife to slice through the chocolate without cracking it.
This is an edited extract from How to Plan Anything Gluten Free by Becky Excell, published by Quadrille Books.
comments